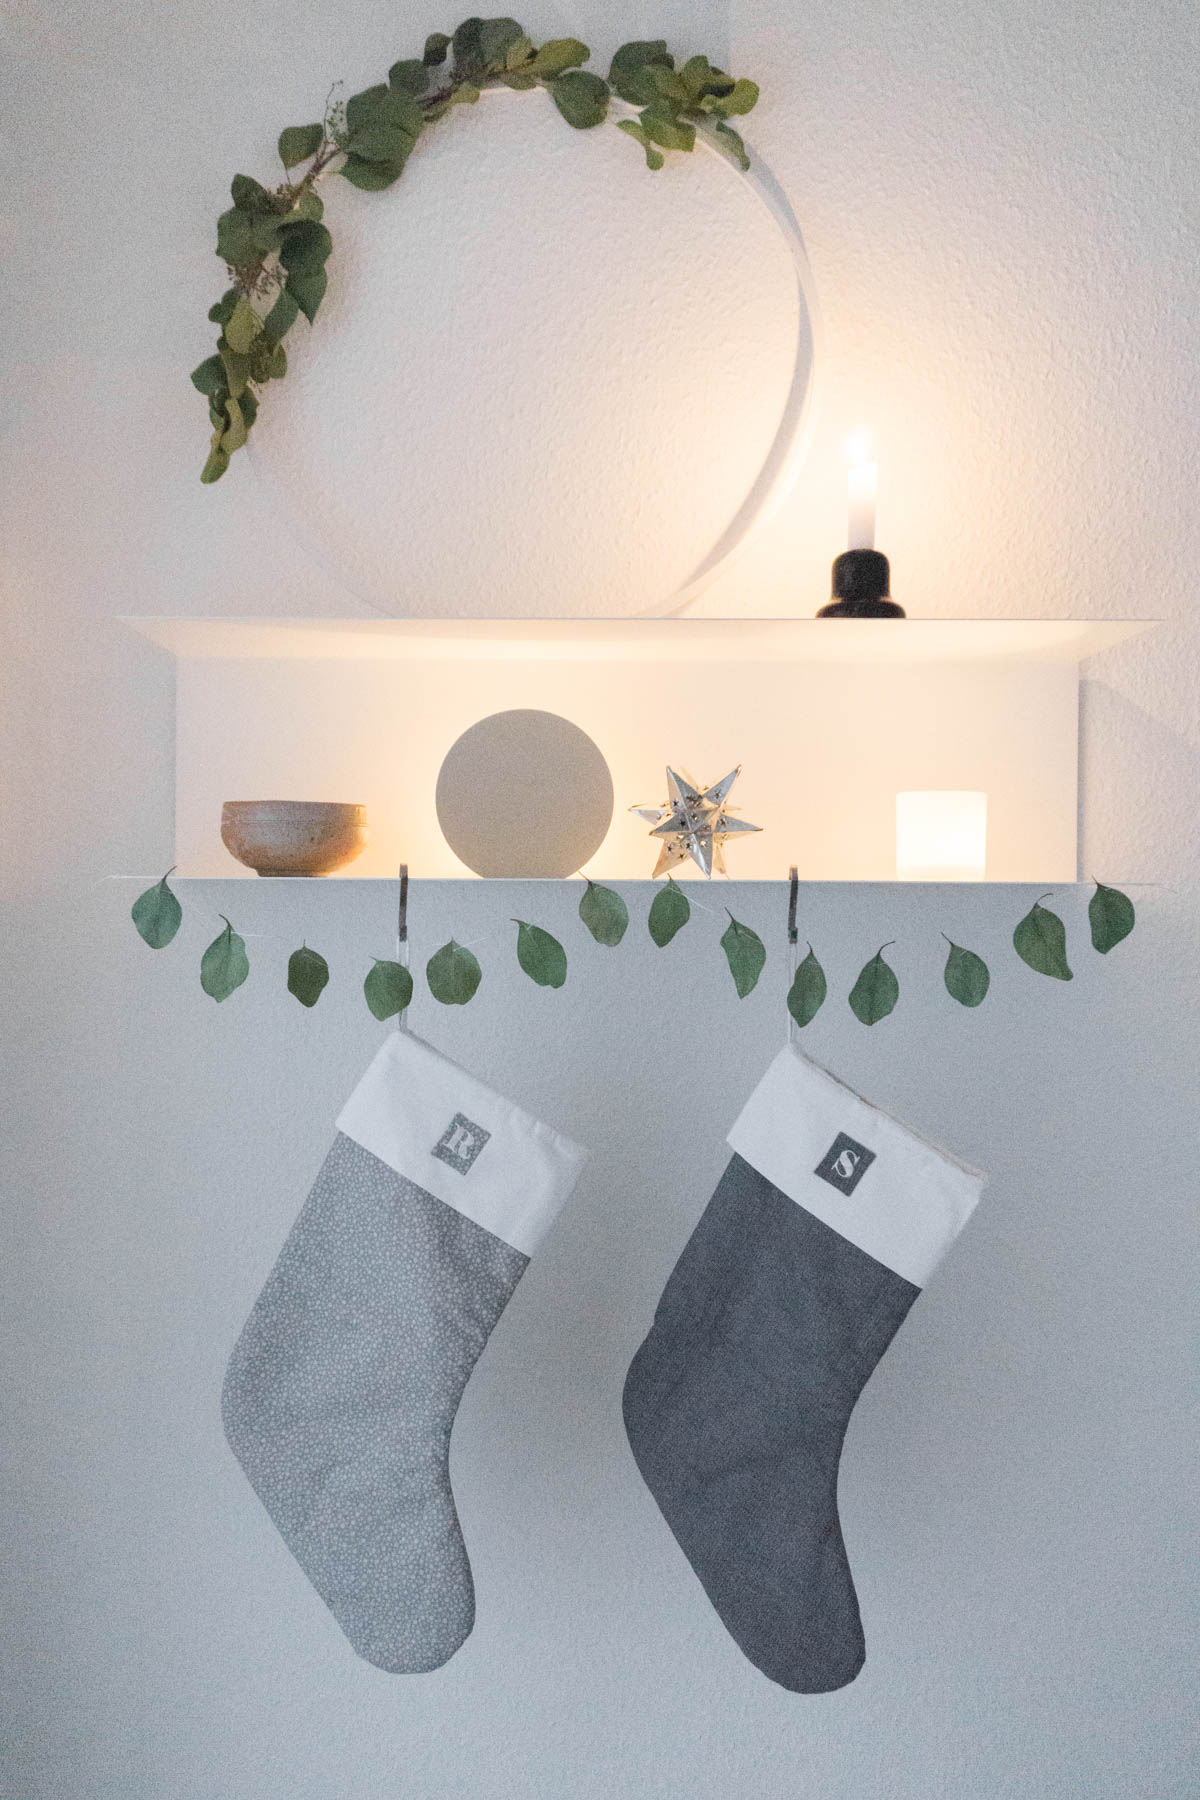
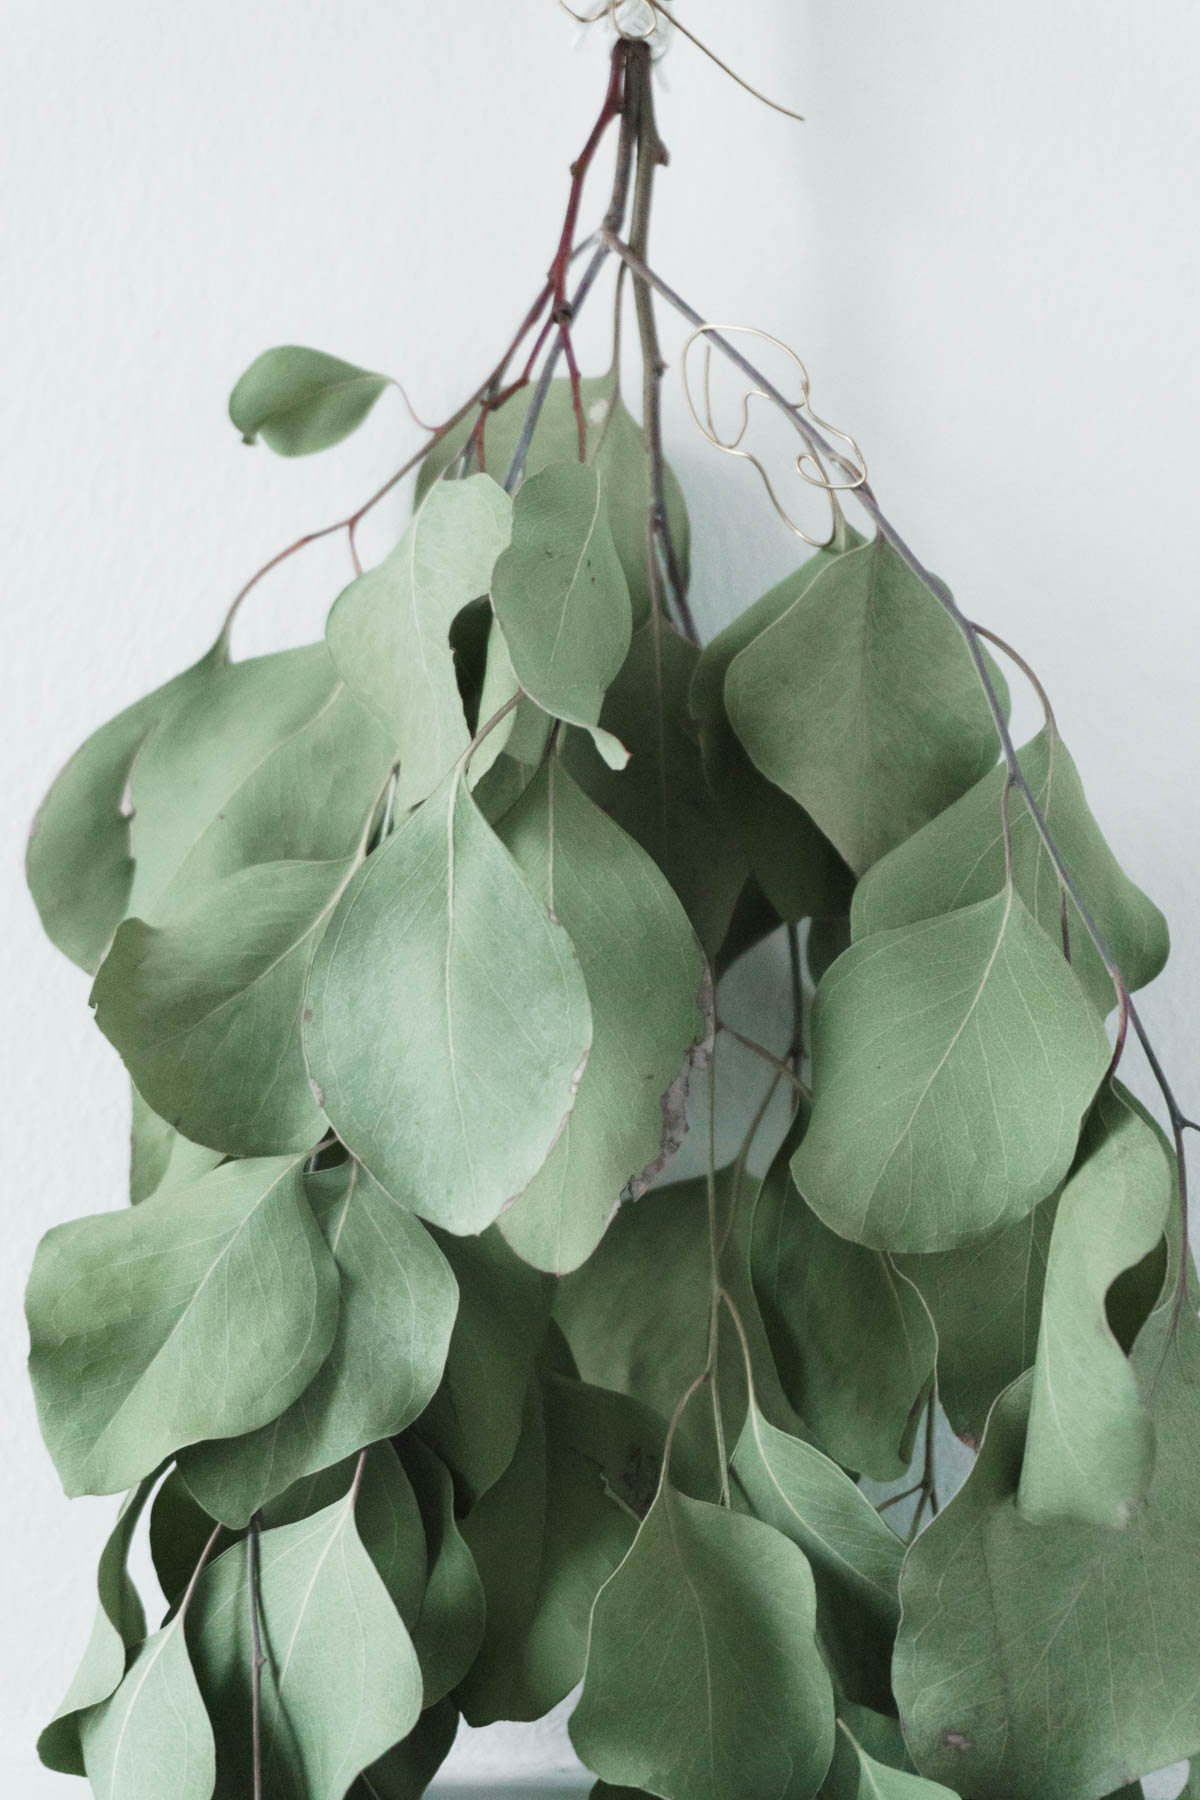
This eucalyptus garland is dainty and delicate – I love how the leaves seemingly float in space.
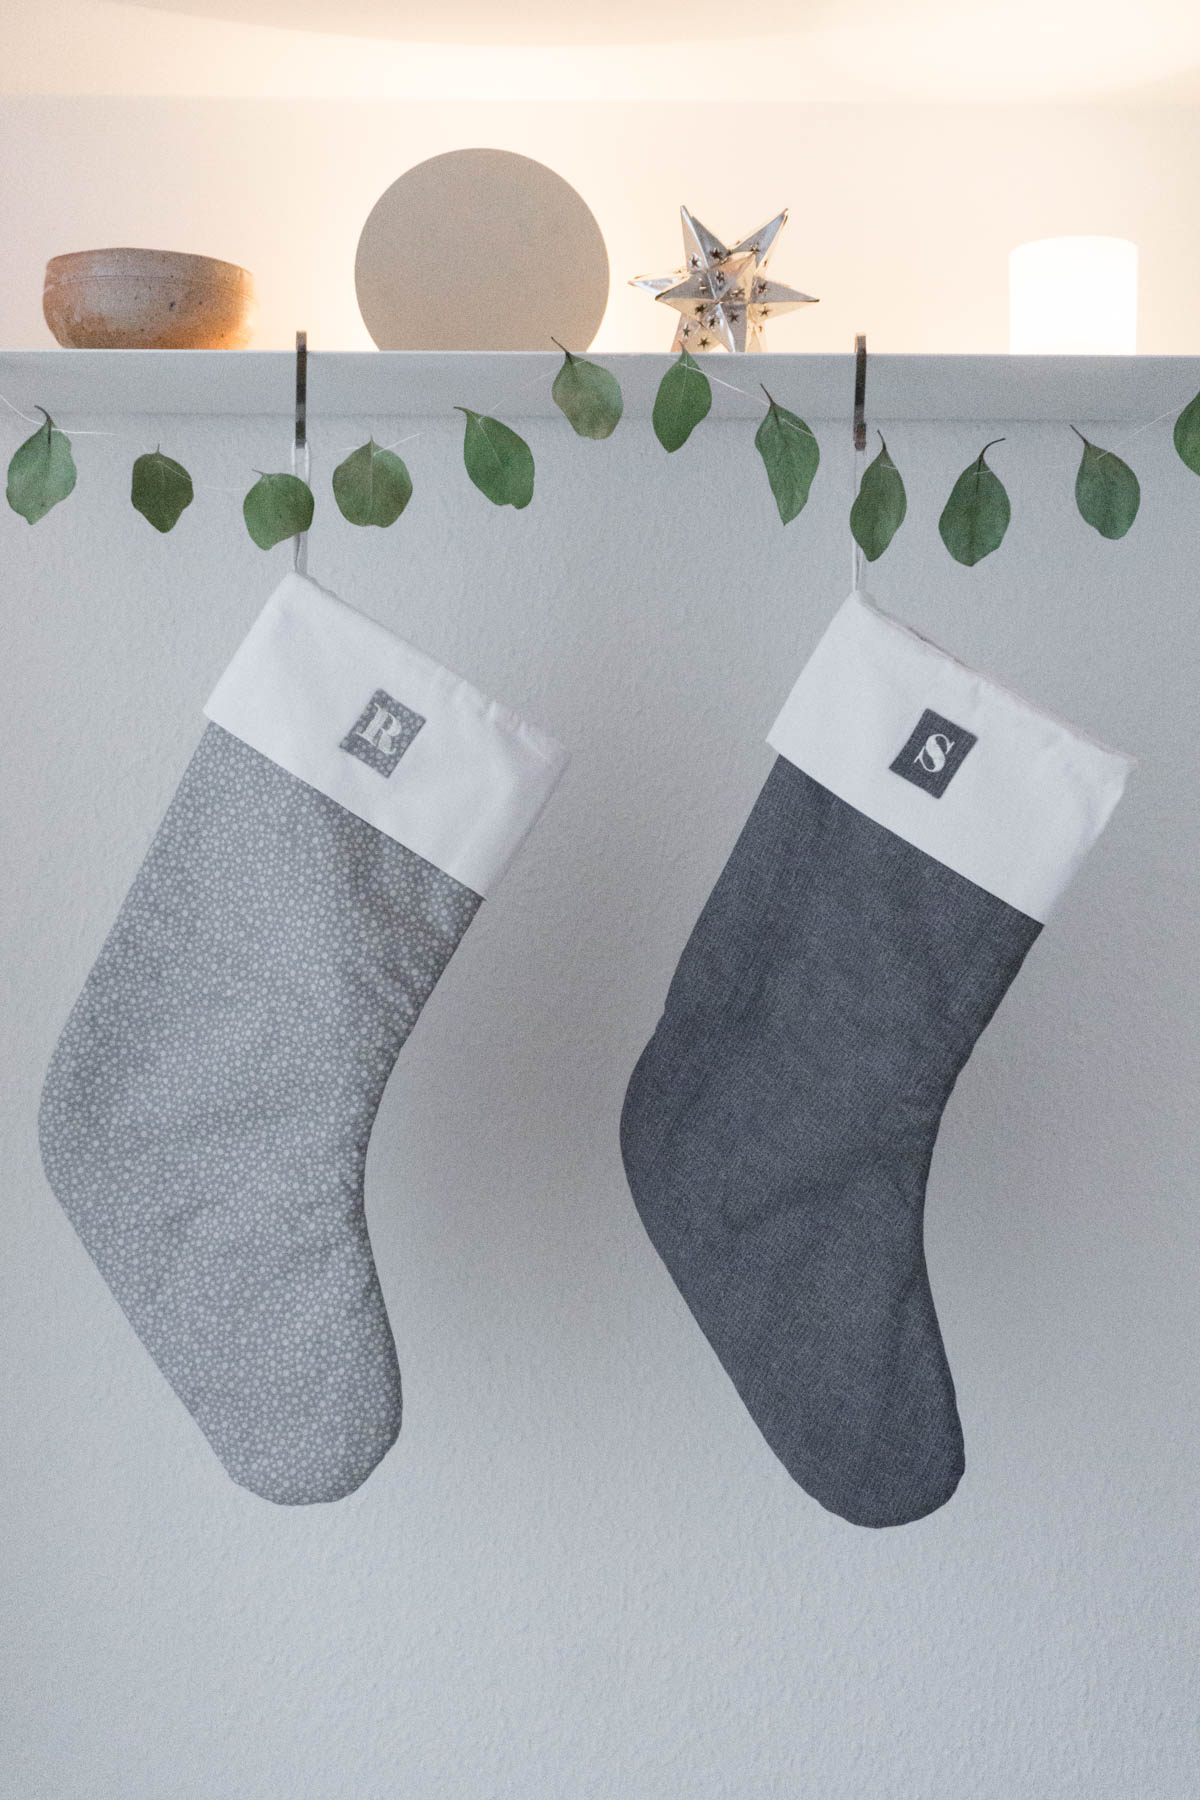
For my second “Scandinavian Christmas” entry, I’m excited to share this DIY tutorial for eucalyptus garland. I made the garland for the shelf in our entryway where I hung mine and Sven’s Christmas stockings. It’s the first thing you’re greeted with when you enter the flat and it feels oh-so festive!
Before we moved to Germany, my mom made these beautiful grey Christmas stocking for Sven and me. Stockings are such a special tradition and it was important to bring that tradition into our new home. I styled the shelf with other Christmassy objects like candles, handmade pottery, and a metal star which we bought while traveling in Mexico.
I apologize for the graininess of the photos above. It’s been so dark here for the last few weeks which makes shooting really difficult, especially in the entryway where there are no windows!
– scroll down for the directions –

DIY Floating Eucalyptus Garland
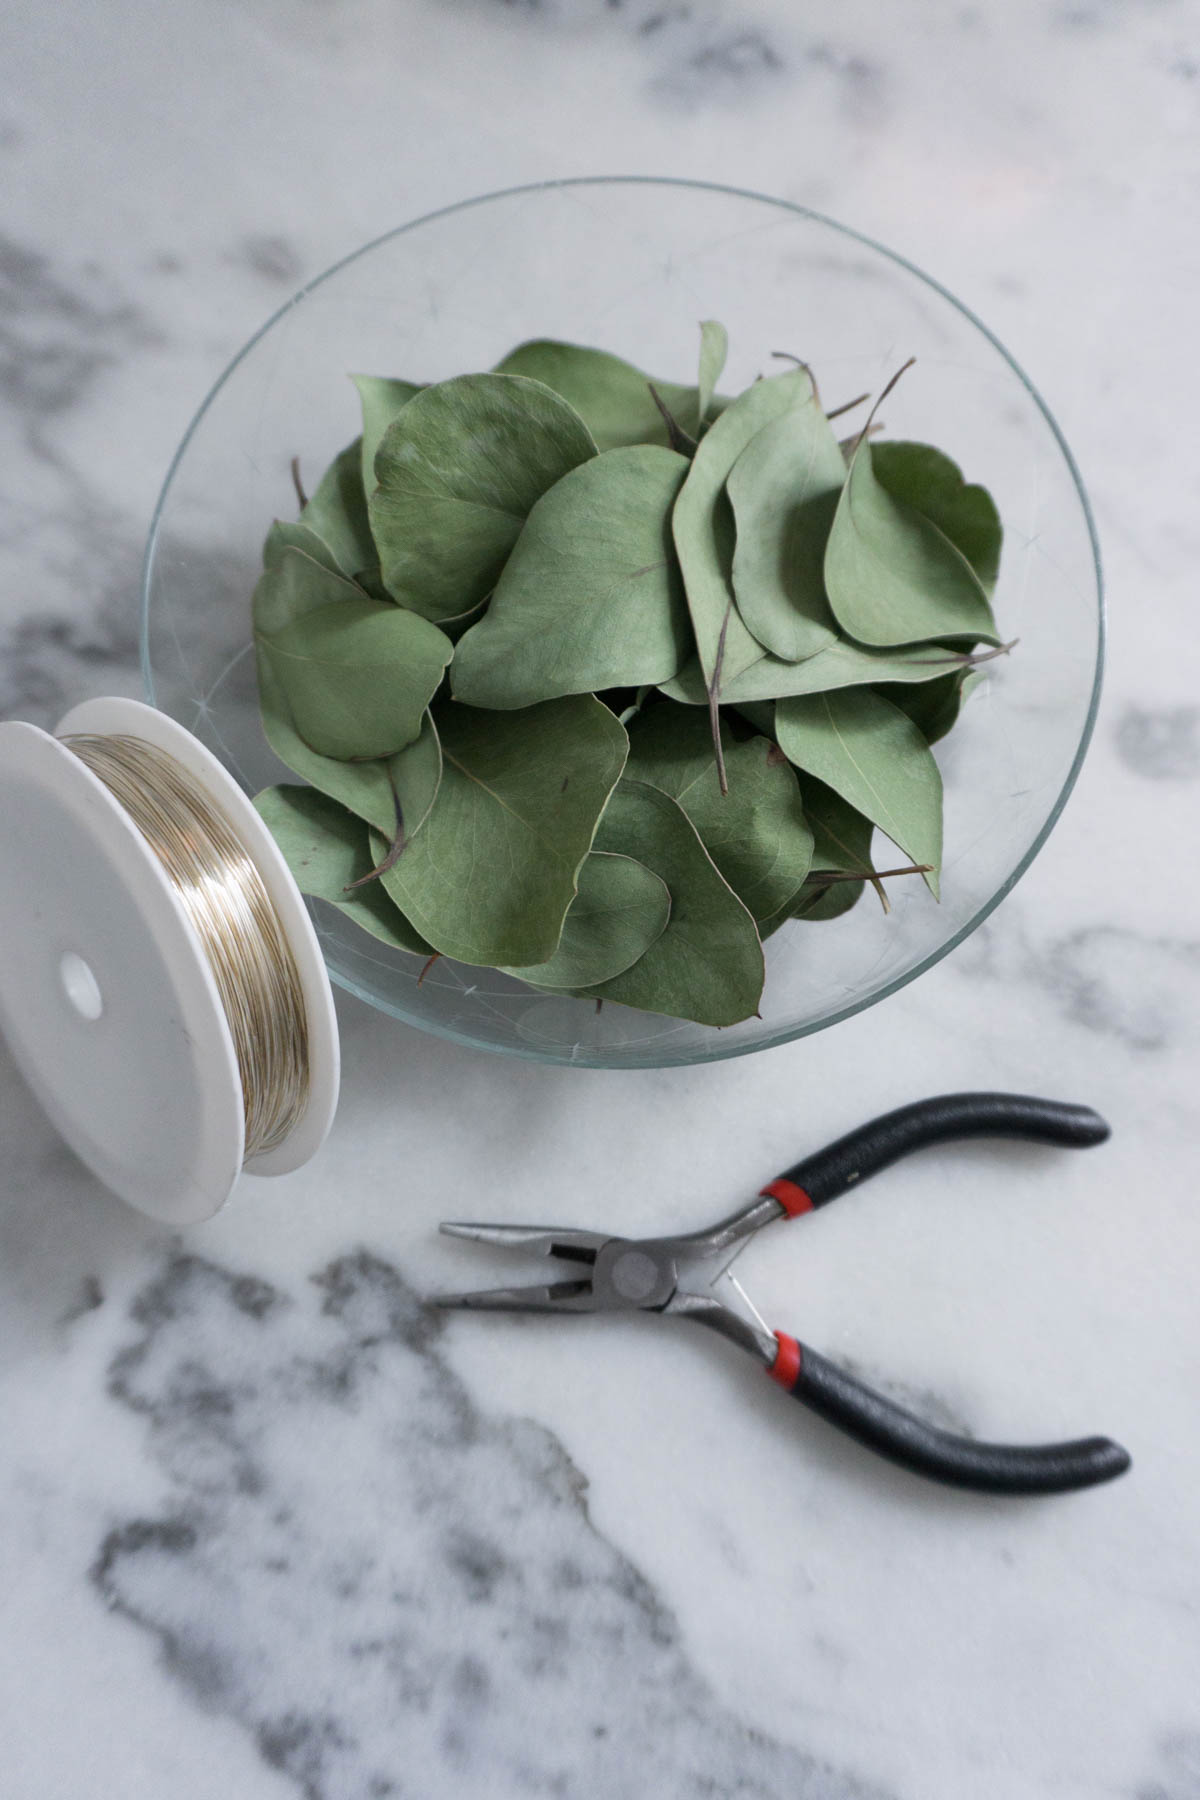
Materials:
This DIY garland is incredibly simple and only requires:
– dried eucalyptus leaves –
– fine gauge wire –
– needle nose pliers –
Directions:
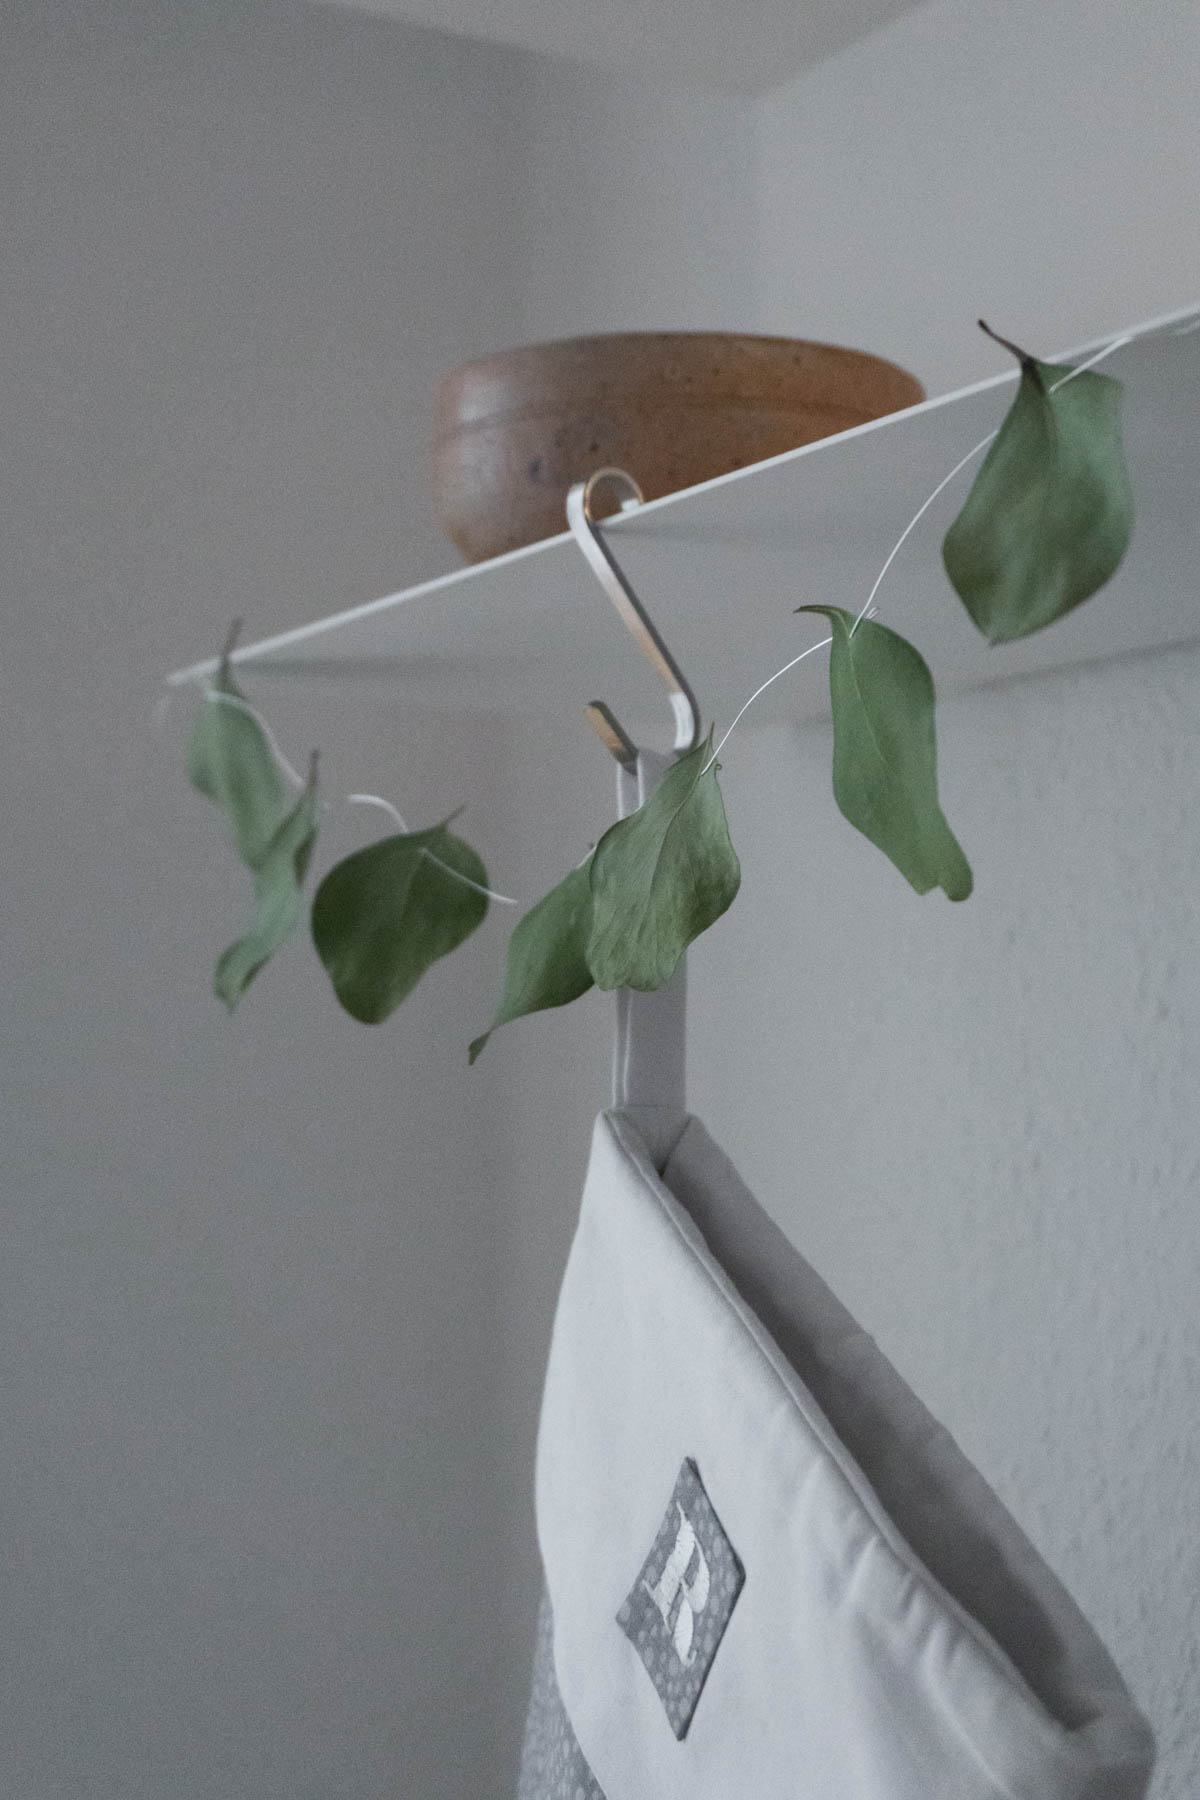
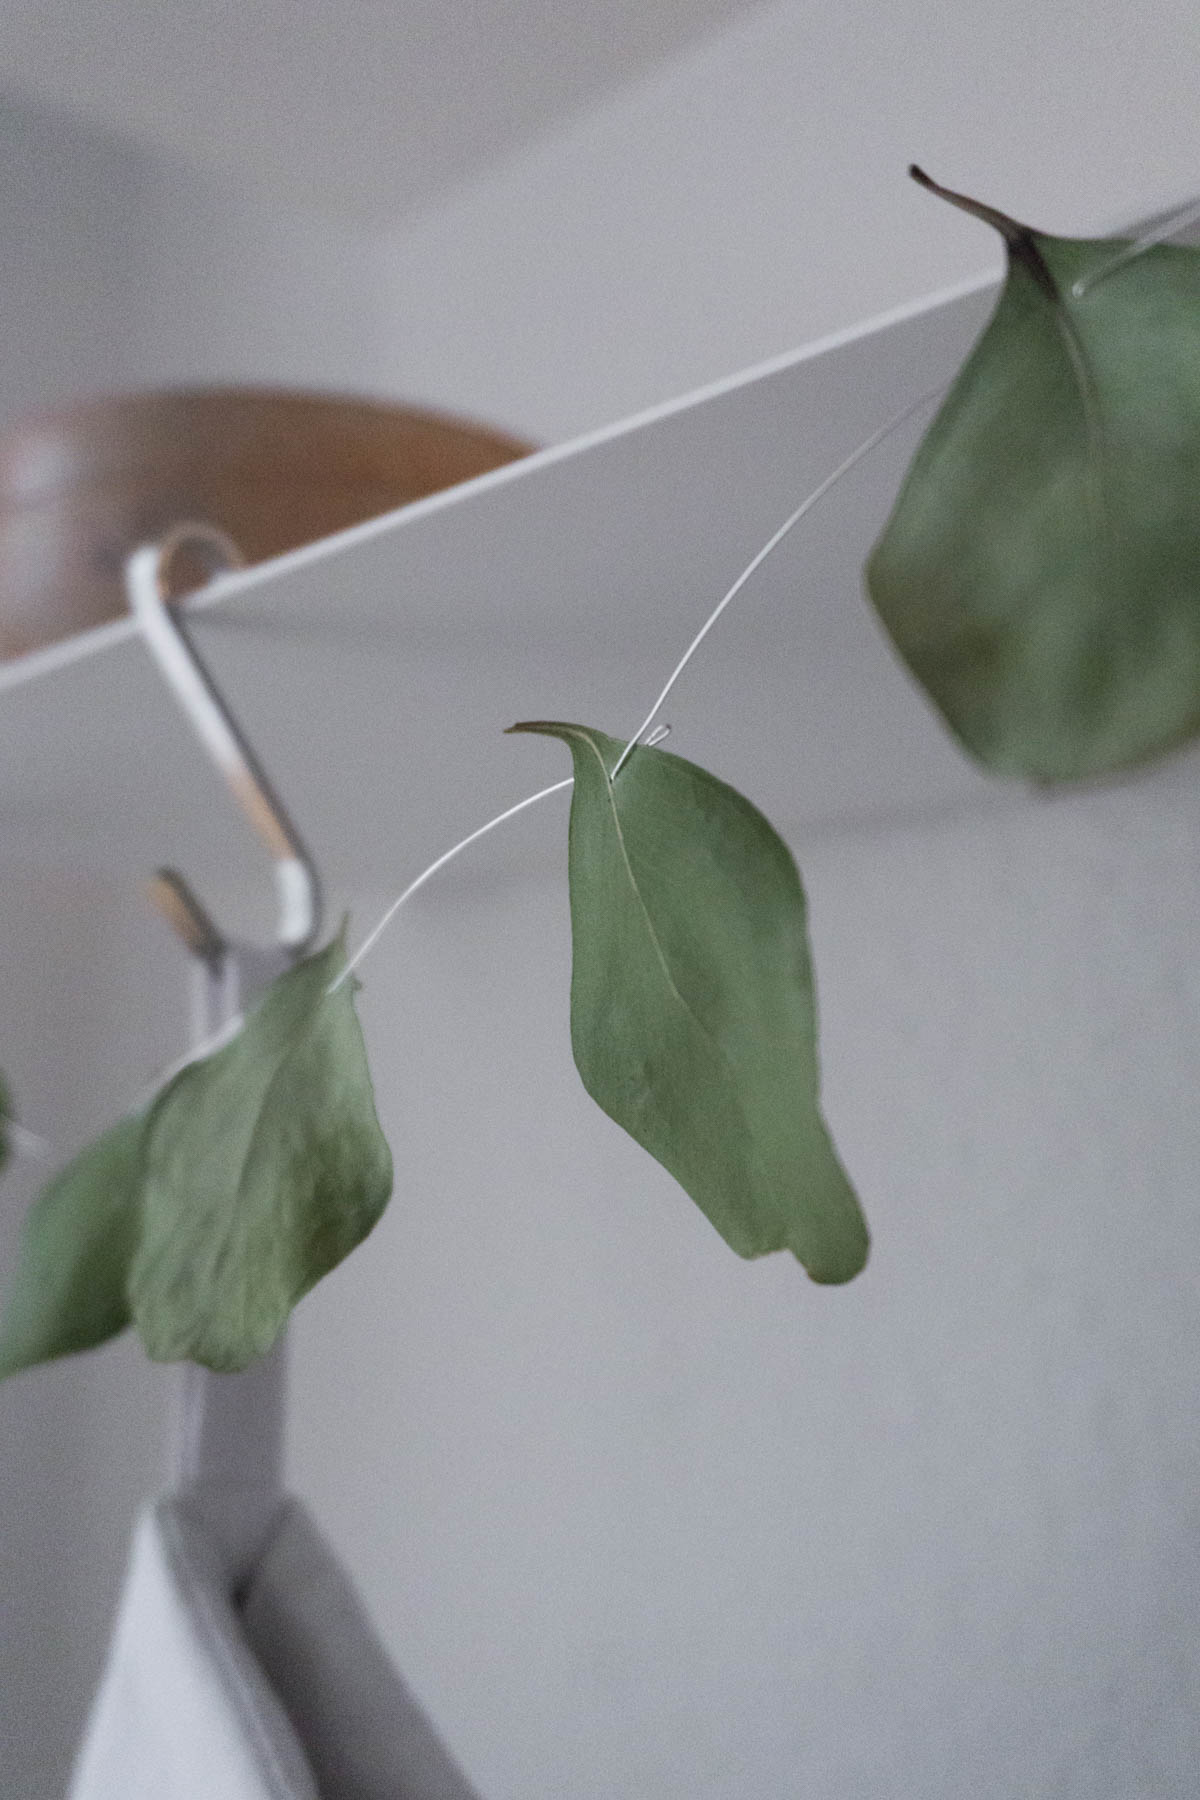
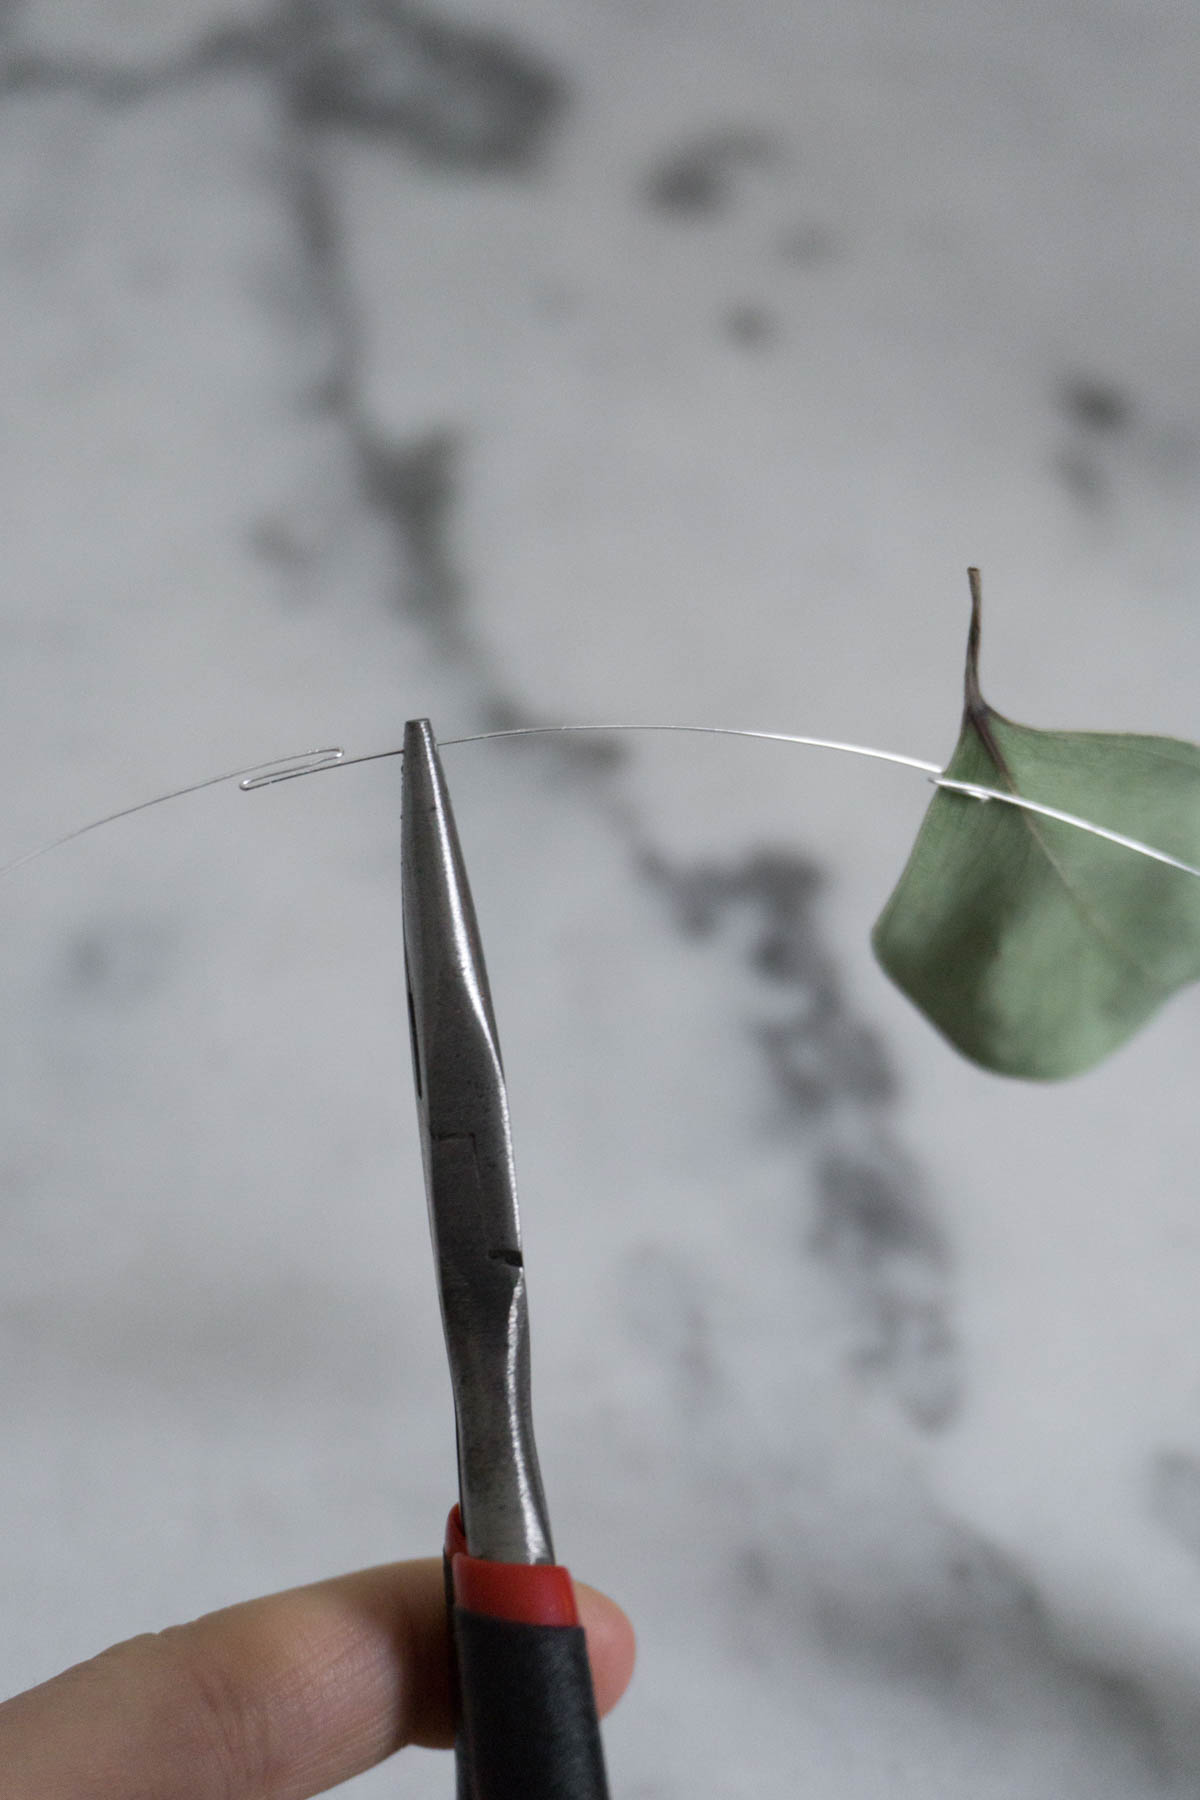
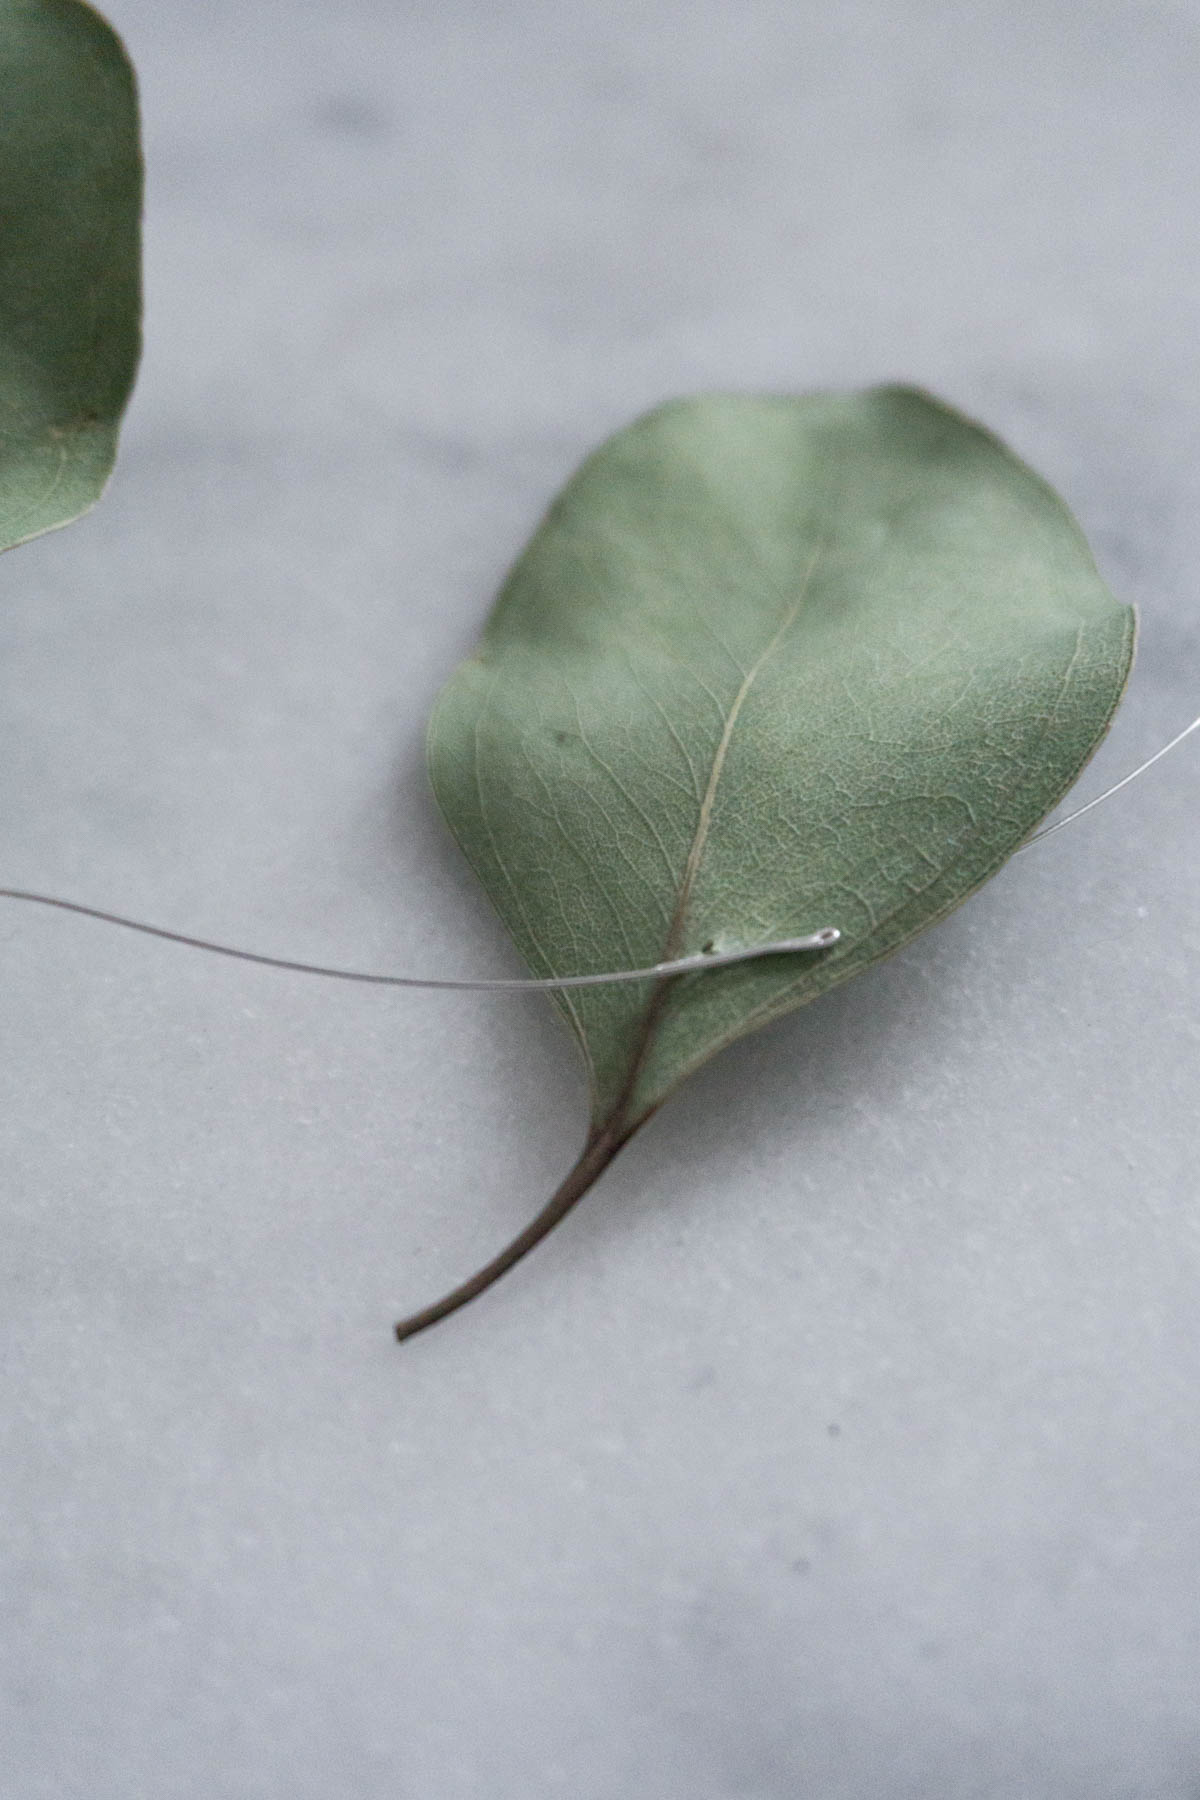
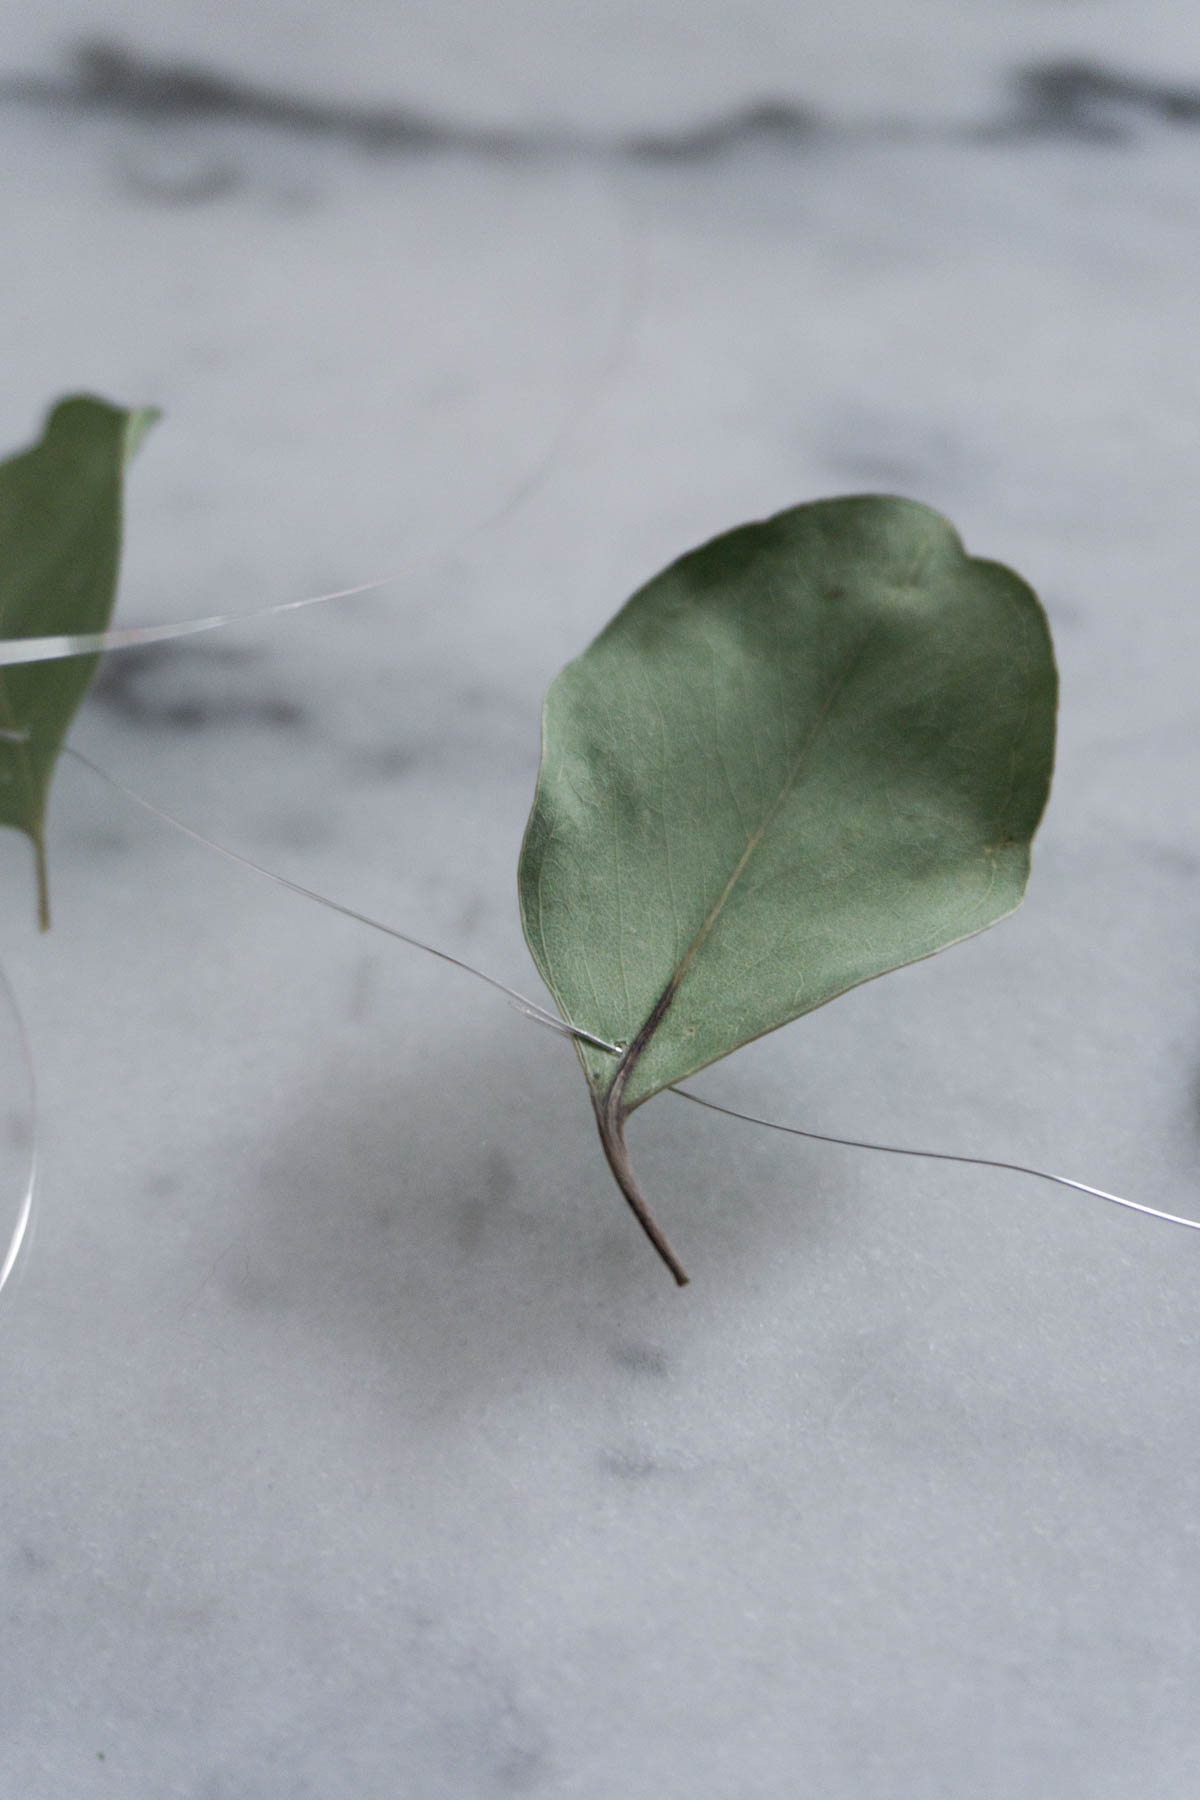
I wish that actually making this garland was as simple as stringing eucalyptus leaves onto the wire, but unfortunately it requires a bit more work than that. The goal is to construct the garland in a way so that the leaves are spaced equally apart and face the same direction. In order to do this, you’ll be making a series of bends in the wire to secure each leaf in place. Think of these bends as mini-paperclips!
Measure how long you would like the garland to be and cut your wire 10 centimeters longer than that length. A few centimeters from the end of the wire, make a “S” shaped bend like shown in the photo above. Slide the first leaf onto the wire – the wire itself will be able to puncture a tiny hole. Once the leaf is secured in the “S”, use the pliers to pinch the wire closed around the leaf.
Repeat this process down the wire until you get to the end, but remember to pay attention to your spacing. Try to orientate the “S” bends in the same direction so that the leave hang evenly. Because this garland is extremely lightweight, you can easily secure it in place using clear tape!